

How To Paint Windows On Canvas
In Part 1 we looked at how to chief the basic features of your digital photographic camera, so you can emulate how your eyes see things in nature to give you lot fantastic reference photographs for your still life painting.
In Function 2 we saw how small incremental changes in your composition and lighting can instantly create a more than dramatic and pleasing image for a painting.
So for Function 3, we're on to the painting…
A footstep-by-step acrylic painting of a glass of water
The image beneath is going to be my reference photo to work from for this tutorial. It can be 'correct clicked' and 'Save image equally', so you can employ information technology equally a guide.

Here'due south my pencil drawing you tin also work from:
Materials you volition need for this tutorial:
- 30 cm x xxx cm pre-primed white sheet.
- Size six Black Hog Oil brush from Jackson Arts – filbert
- Size five Kolinsky sable from Rosemary & co – circular – (any small-scale circular will be fine)
Paints
- Creative person quality Titanium white – Invest in this white fifty-fifty if you use student quality paint for the rest of the colours.
- Burnt umber
- Mars black or Ivory black
- Yellow ochre
- 3B pencil
- Kitchen roll
- Cranked handle palette knife
- Jam jar for cleaning brush.
- Small dipper for diluting paint
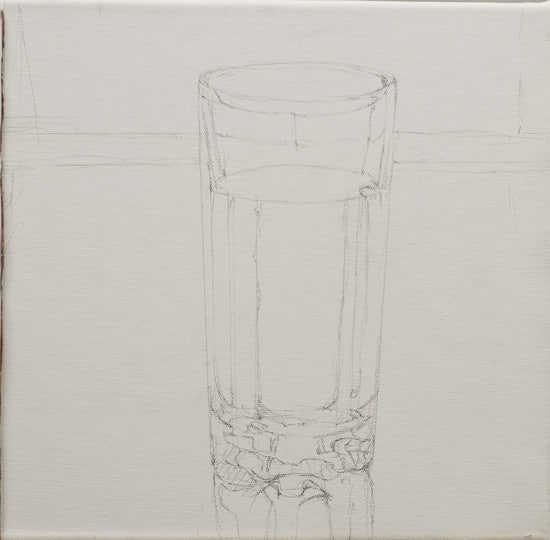
Step #1. Draw out the image
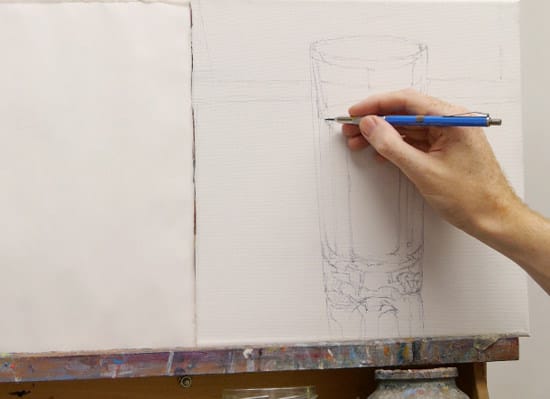
Using a 3B clutch pencil, I depict out the master shapes and lines paying special attention to the shape of the ellipses in the water, make certain the edges of the ellipses have a slight curve to them.
Spend some time checking the shapes earlier you brainstorm the painting. Because it is quite a monochrome study, nosotros're going to exist relying on the cartoon to help united states of america create the illusion of realism.
Also, notice for this particular painting, I haven't used a coloured ground, I'chiliad just painting straight onto the white canvass.
Why?
There are some odd occasions when if the subject matter you want to paint is very light in tone, you lot tin can use the white of your canvas to your advantage. Having the brilliant white underneath adds an underlying glow to the slice and a luminosity to the water.
Step #two. Establish the warm undertones

Just using Burnt umber, I wash in whatever areas in the motion picture where I can see a slight warm glow. There isn't very much in this particular painting merely it merely helps to add a slight glow for when nosotros add in the darker tones in the next stage. I'thou using a circular constructed brush, dipped in h2o so it is quite a watery wash.
Step #3. Establish the darkest darks
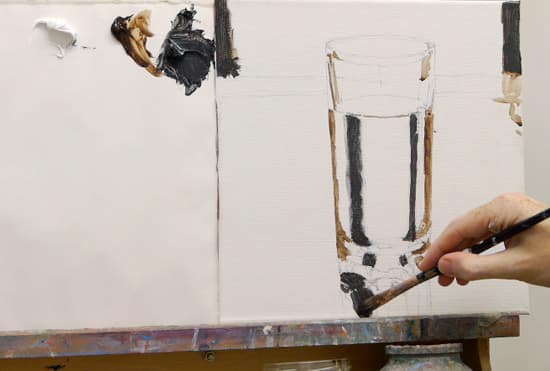
I at present put out some Mars Blackness and using the squealer filbert, start blocking in the darker tones to the painting. Using thicker paint than the previous application because I know I really desire these areas to be dark and don't desire any of the white of the canvas shining through.
Pace #iv. Mix a colour cord with your palette knife
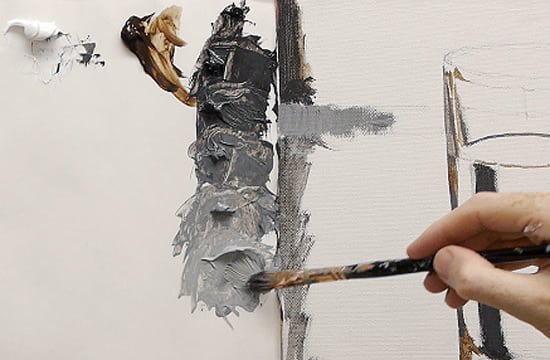
I at present mix a colour string using Titanium white and the Mars black. I'k looking for modest incremental jumps in tone, that aren't too big but can however enable me to run into a slight deviation on the sheet. If yous're just starting painting, working with a stay-wet palette tin help to go along the color strings moisture when you lot first mix them making your painting quicker after you've made the initial mixes. You lot can read more nearly colour strings here.
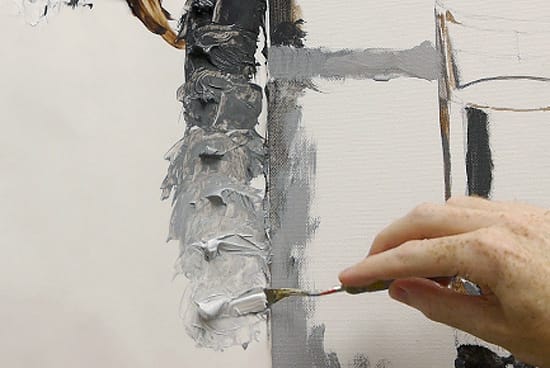
The colour string continues correct down to nearly white. I don't go to completely white, but am aiming for the lightest tone to match the brightest areas in the photo, which in this case is the area in the eye of the glass and on the surrounding tabletop.
Footstep #v. Painting the mid-tones

At present with the whole string of colours ready, you can paint quite quickly working betwixt the tones and scrubbing in the greys. I'm keeping the paint at a reasonable thickness to comprehend over the white and to give me enough paint so I tin can mix it with the other tones whilst they're still wet.
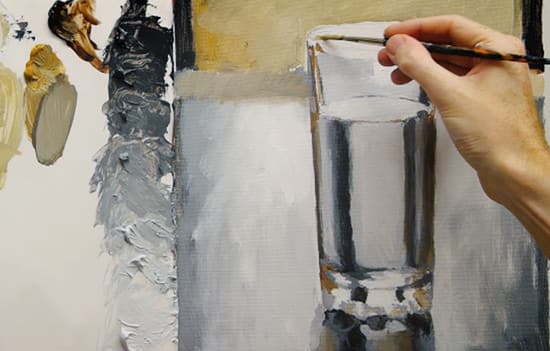
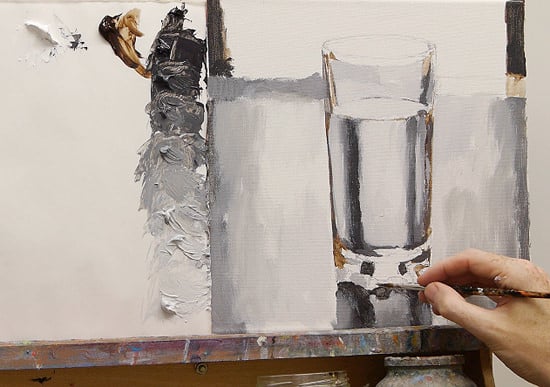 I then swap to the smaller circular brush painting in any of the grey tones in the detail at the lesser of the drinking glass. Detect how there are yet elements of the warmth from the Burnt Umber showing through.
Step #6. Introducing Yellow Ochre
Using a mix of Yellowish Ochre and a affect of Titanium White, I scrub in some of this yellowish tone into the background. I'grand not going to paint the green as bright as in the photograph, as for this study I want to keep it quite tonal and monochrome.
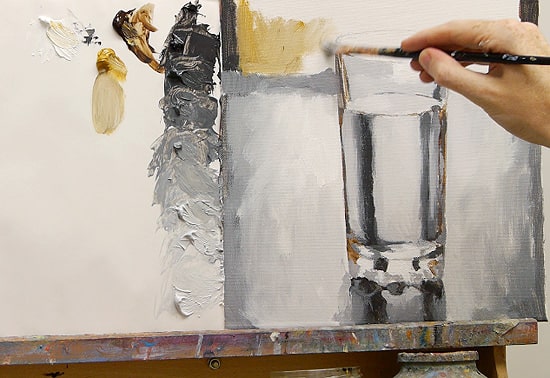
Step #7. A more muted mix
I make a more muted mix using the Xanthous ochre, Titanium white and a touch of the black.
This very muted deadening dark-green volition residuum with the painting, even so requite a fleck of background colour to isolate the clear drinking glass from the groundwork.
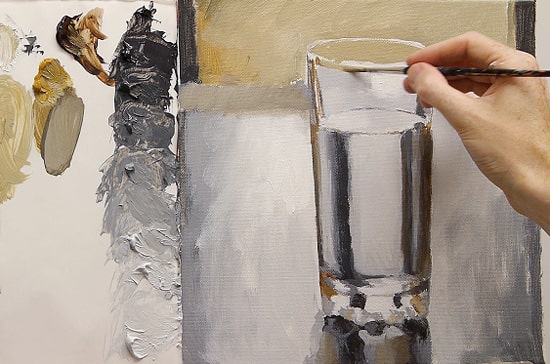
Then I can start to use the smaller circular brush to paint the spaces either side of the fine rim of the glass. This mode past painting up to the rim it's easier to create a smooth, make clean ellipse shape. This superfine line will help to add refinement to the painting, even though a lot of the before painting is quite gestural.
Having this mix between fine lines and painterly brush marks really makes this style of painting work.
If we were to paint just using fine lines, y'all can run the risk that your paintings become likewise graphic and accept an unnatural crispness to their stop.
Pace #8. Finishing touches

I now add some final white highlights just using Titanium White, also adding minor subtle hints of the greenish/grey tone onto the very bottom of the glass.
This helps to subtly bring the background tones together with the rest of the piece.

This painting is quite straightforward and simple just painted this manner really gives you lot an effective painting of glass and water.
The results are realistic, without getting besides hung up on the details within the piece, I actually promise y'all've enjoyed the serial tackling a perceived tricky subject field of reflections and water.
Now Available…

Detail taken from Reflection, Oranges – Nevertheless life Masterclass, Will Kemp, Acrylic on board
If you desire to accept your still life paintings further and learn how to paint more complex cogitating surfaces (and discover how simple they can be) you lot should have a look at the Still life Acrylic Masterclass Course.
Source: https://willkempartschool.com/how-to-paint-glass-reflections-with-acrylics-part-3-of-3/
Posted by: clevengerheaden.blogspot.com
0 Response to "How To Paint Windows On Canvas"
Post a Comment